A Victorian cravat is a type of neckwear that was popular in the Victorian era. It is a long, narrow piece of fabric that is worn around the neck and secured with a knot. Cravats were a fashionable accessory during the Victorian era and are still worn today by those who appreciate vintage fashion. If you would like to learn how to tie a Victorian cravat, follow these steps:
- Begin by draping the cravat around your neck so that one end is longer than the other.
- Take the longer end of the cravat and make a knot by bringing it over the shorter end and under it.
- Bring the longer end of the cravat over the knot and tuck it through the loop that has formed.
- Tighten the knot by pulling on the ends of the cravat until it is secure.
- Adjust the cravat so that it is centered on your neck and the ends are of equal length.
- To finish, adjust the knot and the folds of the cravat to your desired look.
There are many different ways to tie a Victorian cravat, and the above method is just one example. With a little practice, you should be able to master this stylish neckwear accessory and add a touch of vintage charm to your outfits.
Step by step guide to tying a Victorian cravat
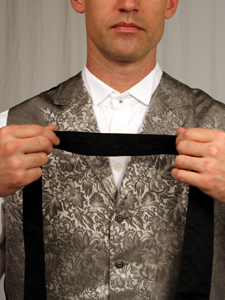
Step 1 Victorian cravat
Hold the cravat in front of you, as shown, with equal length ends.
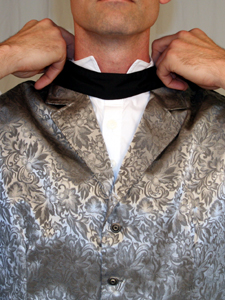
Step 2 Victorian cravat
Put the cravat across the front of your neck, crossing the ends in the back.
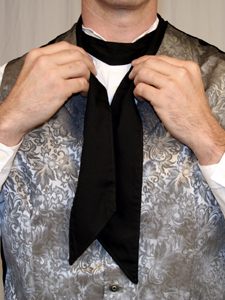
Step 3 Victorian cravat
Bring the loose ends forward again, adjusting the fit so it’s comfortable but snug.
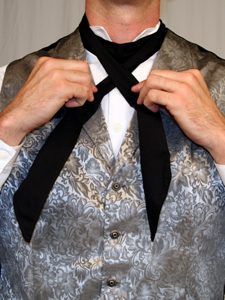
Step 4 Victorian cravat
Cross the loose ends in front.
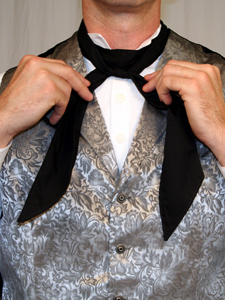
Step 5 Victorian cravat
Make a simple knot, but leave the knot loose for the time being.
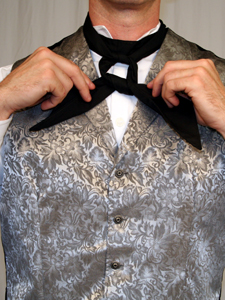
Step 6 Victorian cravat
Make another knot in the opposite direction, again leaving the ends loose.
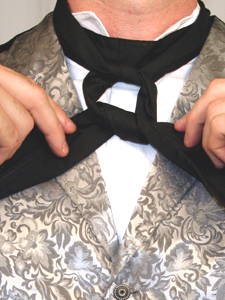
Step 7 Victorian cravat
This is actually a close-up of the properly formed knot created in step 6.
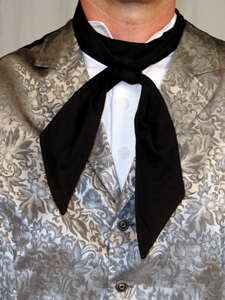
Victorian cravat
This is actually a close-up of the properly formed knot created in step 6.
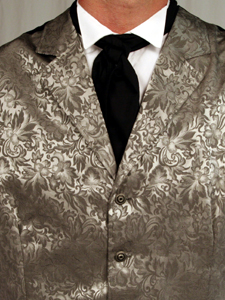
Alternate look
If you prefer a more tidy look, tuck both ends down into the vest.
